RelicBlade Expansion announced – Volgelands

Sean Sutter announced that the next update for RelicBlade from Metal King Studio is The Volgelands Adventure Campaign setting. This will be going to Kickstarter November 23rd, 2018. Hopefully in there we will see not just a new campaign book but an addition to the factions that are currently available. Some of the factions could be inferred from the art to the the Battle Pigs (a personal favorite), the Lone Guard, and The Bone and Darkness factions. We might also see an expansion of Temple of Justice as they have recently been formalized as an additional faction and the Knight is included in the art as well.

We will be sitting down and chatting with Sean for our podcast so look for that upcoming episode soon.

image0.jpg

Facebooktwittergoogle_plusredditpinterestmail

What is Bird’s Eye Review?

I just wanted to take a quick moment and introduce a series I’ve been plotting for a while. I’m calling it “Bird’s Eye Review”. Because, ya know, bird jokes. When you share the name with a local bit of fauna, you tend to get inundated with some bad jokes and puns. Doesn’t help that some specific English folklore and comic book characters also share that name. (I swear, if the Batmobile looses a wheel one more g-d time.)

The idea of this series is to give a quick overview or impression of a game. A longer distance look when compared to an in-depth, page-by-page, kind of approach. I think the best approach is to present some of game’s content that you don’t get to read about in the publisher’s blurb, and let you go from there. Make sense?

I’ll be releasing these about new games and old games. Even games that Tim dislikes. I’m hoping this can turn into a catalog of systems that folks can refer to over time to remind themselves of an old system, find something new, or just grow their awareness with.

As always, I’m interested in feedback throughout the series. If you ever want to make some commentary, feel free to do so. The best place, as always, for these discussions is on the Skirmish Supremacy Street Team Facebook Group.

And without further rambling, you can find the first in the series here.

Facebooktwittergoogle_plusredditpinterestmail

BER: Last Days

Bird’s Eye Review: Last Days

Cover image of Last Days

Author:

Ash Barker

Website:

Find it on Osprey’s site here

Stand alone product?

Yep

Basic concept:

80s and 90s inspired zombie apocalpyse survival horror

Stand-out mechanics?

Flexibility with narrative creation and control

Automatic zombie control

Simple campaign system

Character customization and growth

Models used?

Anything you want. Model agnostic.

Suggested play area?

A 3’x3′ play area is recommended, but not strictly necessary.

Why would you be interested?

You are looking for a modern game that allows you to play the big “What If?” scenario that has been around the pop culture block a few times. There have been a few miniatures games based around this concept. Zed or Alive, Project Z, All Things Zombie, Twilight Creations Zombies!, are just some initial ones I can mention. They all, more or less, have their own approach and focus for their games that is not fully reflected in similar titles. For example, Zombies! focuses only on players vs zombies, no PVP. Some have fallen to the wayside for various reasons, and are no longer being supported, like Zed or Alive.

This particular iteration combines the “living vs dead” you normally expect and the “us vs them” warband/gang/roster/army/party/list/whatever you find in most other miniatures games. This is not intended to be the cooperative, kumbaya approach some films would have you believe in. This game is about looking out for “Number 1”, similar to some video games on the market presently.

Image of internal page for Last Days

You create and customize a group of survivors from a recent zombie apocalypse event. They can be ex-military, ne’er do wells, senior citizens with a grudge, whatever you want. You plant this group in a refuge from the world, an HQ, and then send them out to scavenge the modern wasteland. What happens from there is where the game takes place.

As far as mechanics for playing things out on the table, the basic idea is you use d6 for your dice, you roll, and then add a stat to the roll. If you meet or beat a predetermined target number you succeed. Sometimes you have to do some division, but it isn’t too major. If you have any experience with a miniatures game, this kind of action resolution will be pretty familiar. I perceive the system as being simple to understand and absorb; focused on quick resolutions and keeping the flow of the encounter’s story and the flow of the game. All this is with the goal of pushing around whatever miniatures you choose to use to complete the scenario tasks.

Image from Last Days

The scenarios are kind of what you would expect for flavor and guide you in a game. You can play without these guides easily enough. Actually, most of the scenarios revolve around collecting objective tokens, same as the non-scenario play teased early in the book. This helps lend the idea that this game was designed and intended to be a “Hey, let’s bash at each other while dodge mobile hazards.” kind of game, instead of a “tournament” style game. The scenarios help you tell a better narrative.  

One scenario I have been scolded for not mentioning in my first draft (and rightly so) was the one focused on raiding another group’s Refuge. There’s something about interacting with another player’s traditionally non-interactive campaign perk that really energizes a player’s bloodlust, err… drive for narrative. So far, I think I have come across only two games, including this one, to really offer that.

You can use those little narratives to build a bigger one focused around the campaign system. It’s a pretty straightforward thing we have seen in many games previously. Individual models gain experience, your refuge can grow with a perk system, loot helps you fight later scenarios, repeat. It is up to you to figure out the “why” and the “where”.

Art sample from Last Days
Things that don’t impact the gameplay, but are noticed:

The first thing I noticed when starting to read this book was the tone. I really like the tone. If you have ever watched one of Ash’s YouTube videos, you know what I’m talking about. If I was given this, read it, and then was advised of the author, I would not be surprised at all. Now that I know he’s releasing his own written content, I bet I could identify his future content without prompting. He has a very distinct voice to his writing. I appreciated this. (Please note, he does not refer to anything being “his jam” or “bananas” anywhere in this book from what I can tell. So if you want one of his catch phrases, you’ll just have to wait for an expansion.)

I also appreciated the layout of the book. It makes sense and flows pretty well. I will probably keep it in mind when I think of future reviews and any suggestions I ever make to prospective writers. It might be the case that the book benefits from not having any real “fluff” to get in the way of rules and layout. I find that other books occasionally mix the two concepts in confusing manners. I’ve certainly been guilty of that before.  

Wrap up:

Give it a shot if you think zombie apocalypse and modern-style events appeals to you. You don’t need much you don’t already have. You can use tokens to represent zombies. You can use, as the book references at one point, tape on your kitchen table to represent the play area. You can use whatever miniatures you want. Just grab the book, grab the goods you’ve already got, and start seeing what kind of story you can tell. Acts of heroism or acts of selfish greed, who knows what you’ll come across in a zombie filled wasteland.

Facebooktwittergoogle_plusredditpinterestmail

Treasure Island! A Blood & Plunder Multiplayer Intro Scenario


Over the past weekend, Nick and I attended the Siege of Augusta Wargaming convention in Augusta, GA to help out the Firelock Games crew. During the event Nick was testing out a new scenario that we will be using at our FLGS Giga-Bites Cafe on February 10th and I had the opportunity to run a multiplayer teaching scenario called Treasure Island using my new Caribbean Island board.

There has been quite a bit of demand for me to post the rules for others to use so here you go!

TREASURE ISLAND
Treasure Island is a fun, light-hearted scenario designed to teach up to six people the basics of Blood & Plunder in a single sitting. Each player will be given a 4-man unit of long guns and a 4-man unit of sailors. Here is what is recommended:

Spanish: 4 Corsairos, 4 Marineros
English: 4 Freebooters, 4 Sea Dogs
French: 4 Filibustiers, 4 Marins

For this scenario, there will be no commanders or Force specialty rules, just what is listed in the model entry.

Game Materials Needed
1:  4×4 Water/Ocean Mat.
2:  Multiple island or hill terrain pieces that can act as islands that will fill up approximately 50% of the board.
3:  Jungle/woods terrain and appropriate scatter terrain to help fill in the board.
4:  One longboat with a Swivel Gun
5:  Enough dice to pass around the table. 12 is enough to cover most players.
6:  One single deck of cards.
7:  8 Milicianos Indios models for the hostile locals.
8:  8 Treasure Markers. These should be approximately 25mm to 30mm. A standard figure base will work for these.

Set Up
Place the longboat in the center of the board. Place the island pieces on the board, leaving approximately 6-8 inches of water between each island piece. Place the terrain on the island pieces as you see fit. Place the 8 Treasure Markers on the island pieces at least 8 inches away from a board edge and try to leave at least 6 inches between each Treasure Marker. Do your best to spread them out. Deal each player one card per unit (2 cards).

Deployment
Each player will spread out around the four sides of the table and deploy their units one card length in on the board (approximately 4 inches). Try to make sure that they are appropriately spaced out. Game play will then continue as normal.

Special Scenario Rules
Unknown Lagoon: Models will move through the water and treat it as difficult terrain. They will be able to make standard Shoot Saves. If a unit ever becomes Shaken while in the water, the unit drowns and is removed from the table. While in the water, units cannot fire muskets. Bows and Pistols can fire normally.
Digging Up The Treasure: any unit may spend one action while at least one model is in base contact with a Treasure Marker to dig it up and carry it. Any unit that carries the Treasure Marker will be moving at -1 inch per action point unless the unit with the Treasure Marker is in the longboat. The moment they dig it up, roll 1d10 and consult the chart below.

Roll:  Result
1-3:  Angry Locals: Place a 4 model unit of Milicianos Indios approximately 10 inches away from the unit that just dug up the Treasure Marker and make one Shooting Attack against that unit.
If there are 2 units of Milicianos Indios on the board then nothing happens.
5-8:  Small Treasure Pile: Getting this Treasure Marker to the board edge will score 5 Points.
9-10:  Large Treasure Pile: Getting this Treasure Marker to the board edge will score 10 Points.

Any unit may choose to drop a Treasure Marker at any time to move normally. If a unit is removed from the table while holding a Treasure Marker it will be placed in the center of where the unit was. If a Treasure Marker is dropped in the water then it will take 2 Actions to pick it up.
Angry Locals: Once the Milicianos Indios are deployed on the board they will receive one card per unit for initiative and activation. When they activate, they will focus on attacking the closest unit holding a Treasure Marker. If there are no units holding a Treasure Marker then they will attack the closest unit.
Reinforcements: When a unit is removed from the board it will re-deploy on any board edge of the player’s choosing at the beginning of the following round before initiative cards are handed out.

Scoring
Removing an enemy model from the board with a Fight or Shoot action: 1 point/model.
Getting a Small Treasure Pile to the board edge: 5 Points.
Getting a Large Treasure Pile to the board edge: 10 Points.
The player with the highest score at the end of the game wins.

Ending The Game
This will be up to the organizer but it is recommended that the game last 6 to 8 rounds in total.


And there you have it!  One pirate-filled scenario ready to be run at any convention or game store!

Until next time,

-Tim

Facebooktwittergoogle_plusredditpinterestmail

Number Cruncher

As the year drew to a close, the boys down at the podcast factory had some guests on to talk about playtesting. (Episode 95 ) In that episode, the idea of collecting data about games played came up. In some other podcasts, as the year has closed out, discussions of data collection about games played also came up. Then the year end happened, resolutions get covered, pledged, railed against, and more. In order to maintain a resolution, you have to remember not only that you need to do it, but that you did it. So again, we have data collection as a theme. It seems to be quite the time to talk about the idea in the hobby masses.

Personally, I love data. Simple as that. I find the insights and “oh, really?” moments you get from parsing through collected information about a subject to be really interesting. This leads to a love of info-graphics, but that tidbit isn’t as needed today. Today, we’re going to talk about data collection in your hobby life. A simple thing, but something that can be neat to see at the end of your collection cycle. Besides, most gamers are nerds on some level, right? We love numbers and dice and “mathhammer”. Why not apply that to more aspects of the hobby, but, ya know, in a meaningful way.

What to collect

spreadsheet of times robin did something hobby related

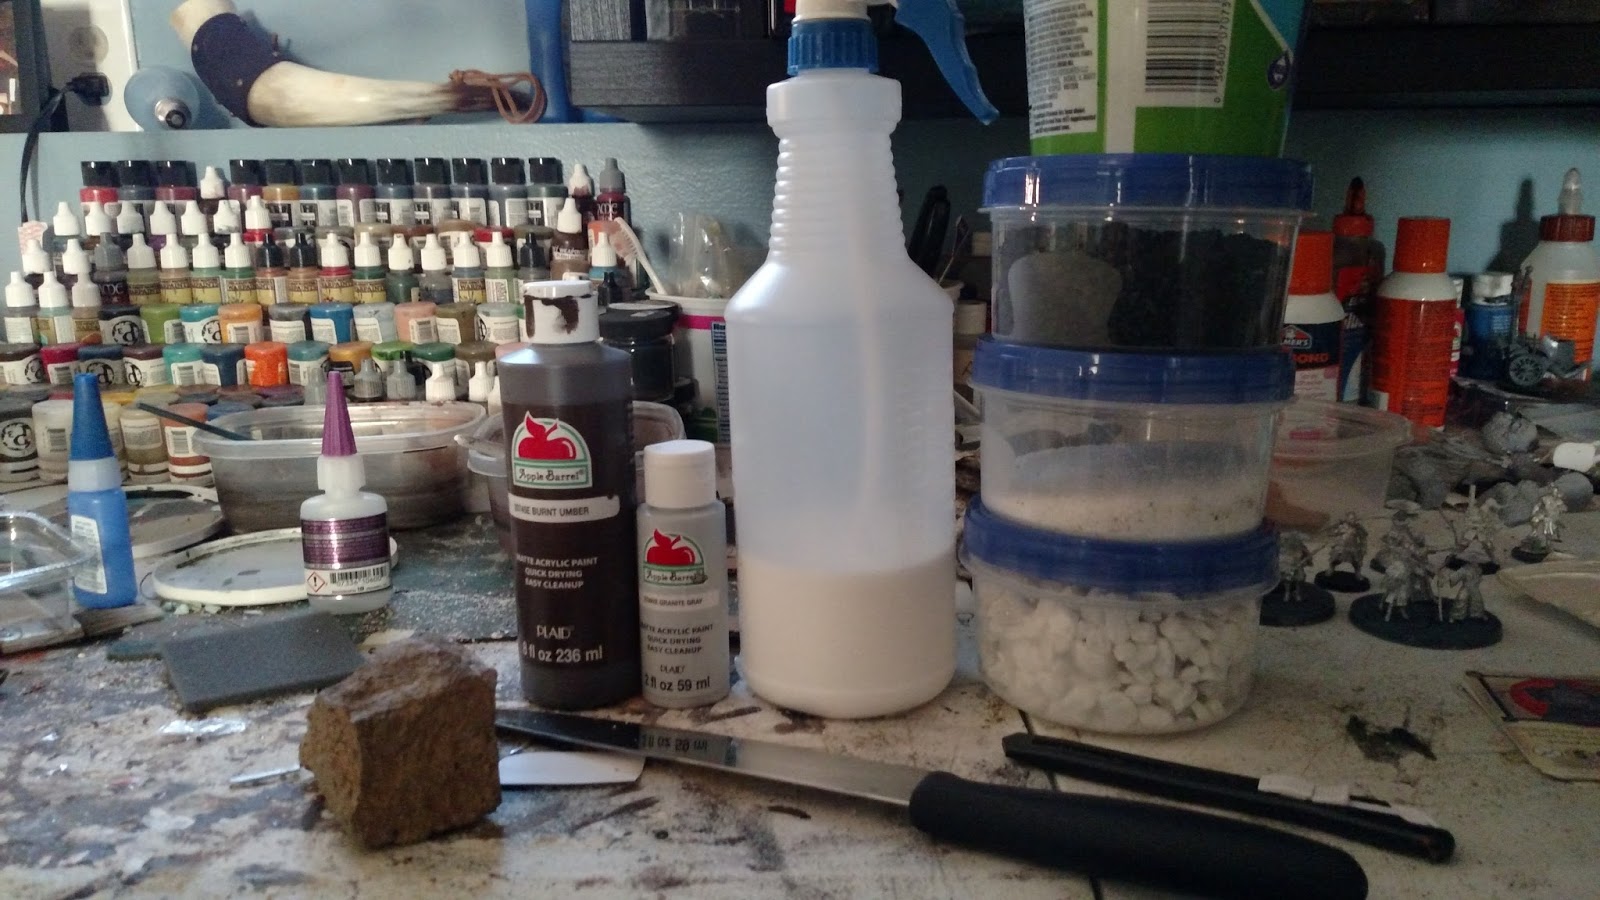
Over the past few years, I’ve been keeping records of my hobby time. This past year was no different. I kept track of hobby time spent in my little corner of the house. I did not track anything outside of that. I kept it fairly simple: Instances where I painted, Instances where I built or assembled models, Instances where I made bases, the number of finished models, and the dates these things all happen. In the past, I only tracked painted models, so this was a bit of a step up in complexity. I did not track time when I only primed a model as that doesn’t feel like it takes enough time to be considered effort.

This year, I’m increasing the complexity yet again. I’m taking the opportunity to track:

  • Number of Painted Models
  • Instances I painted
  • Instances I assembled
  • Instances I played

For each of these, I’m tracking the Game and the Faction as well. This way, I can review later and see what game got the most attention, which faction I played the most, and which models I painted more. I think over time, this could be a neat set to compare with. Did I play Faction A because it was already painted? Did I play Faction B even though it wasn’t painted? Did I focus on one game or did I spread out among many? In the future, what will that look like? Will I see a slow decline of a specific system?

If you want to start collecting data, you need to know what you want to know. You could certainly just start tracking things and seeing what happens. However, you may find you lack certain details because you didn’t think to track them, or you may have unnecessary information that was tedious to collect.

How to Collect it

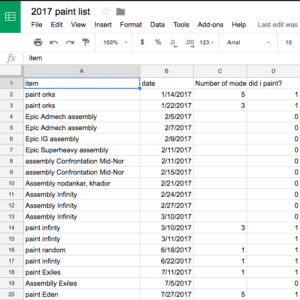
Personally, I used a Google Sheets document. This way I can modify it on my phone, my tablet, at work, at home, anywhere. This leads to less “Oops, I forgot I did that.” You can certainly change it up though.

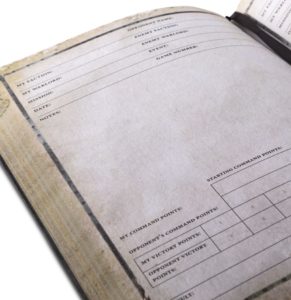
David Witek of Garagehammer used a “little black book” for tracking hours painting. He picked it up because it fit in a small pocket and fit his data needs. Super simple device to collect data. Very “low-tech” and approachable. The problem with this one happens when you have lots of data you want and eventually getting useful information out of it. 

Games Workshop Battle Journal
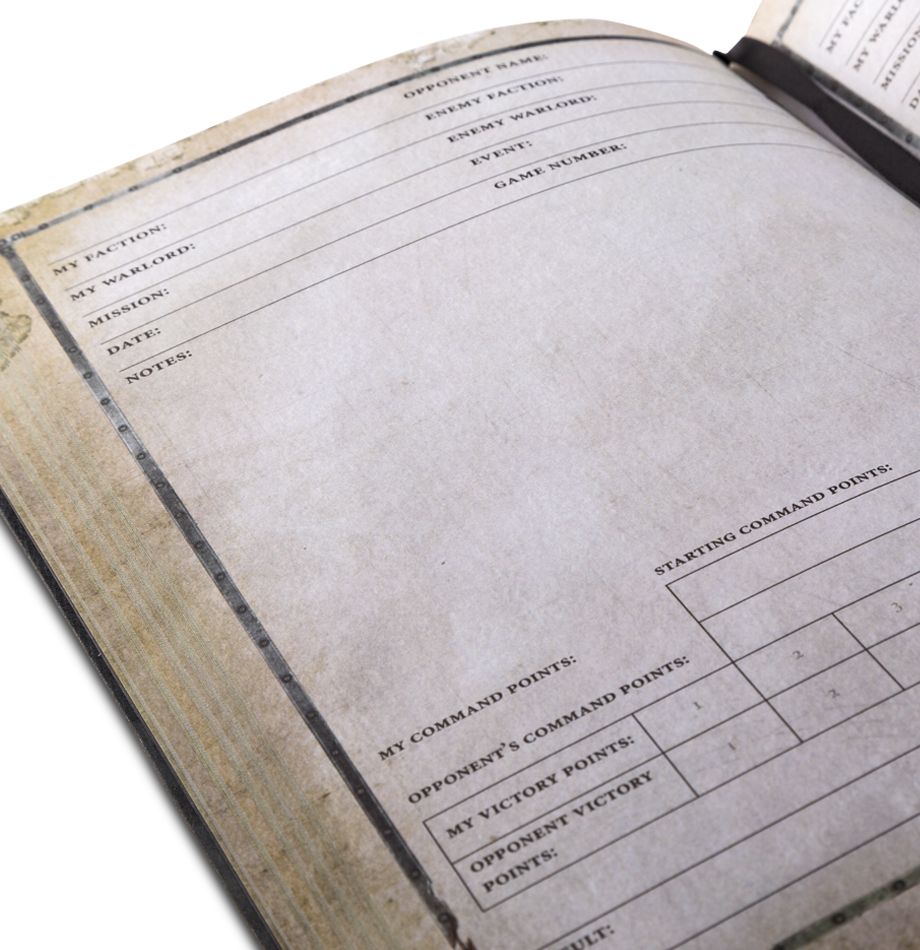
Some folks have guiltily/unashamedly admitted to picking up the Games Workshop Battle Journal. This is a product specifically sold to track games played. It allows for certain bits of information and a spot for photos or notes to be plastered in. I can see the appeal if you like to recount your battle reports to your buddies on a forum or something. The problem with this one is that you cannot collect non-game hobby data with it.

2 Amazon Buttons on a board

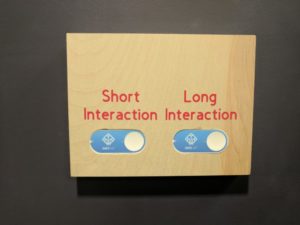
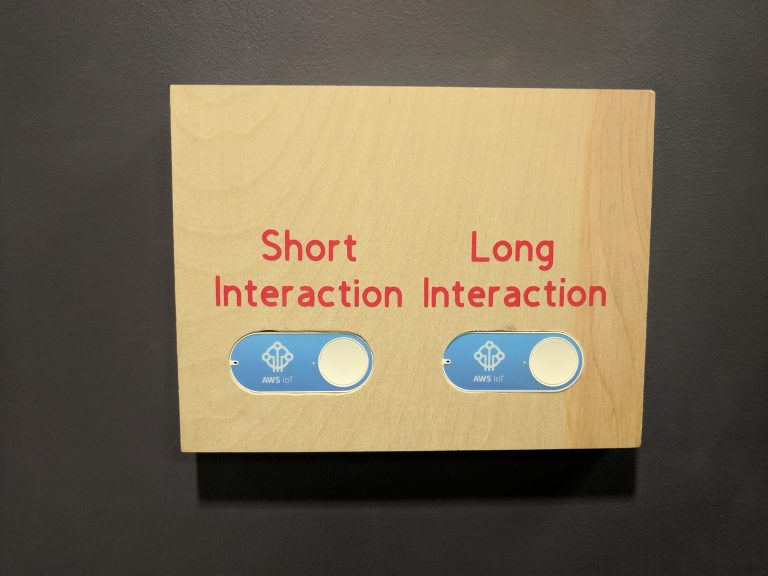
You could go full nerd and use IoT devices. At work, I used an Amazon Button system to track when my students performed certain tasks. It was easy because they just pushed a button hanging on a wall. It was annoying because the type of information tracked wasn’t very robust. It solved the previous problem of them just not tracking things at all, but did have that trade off in scope. I could make it more robust, but long term support and sustainability became an issue

The Caveats

Clean data is very important. I have debated using a Google Form that imports into a spreadsheet. This way I can have a nice, easy interface that helps me keep the information consistent. One of my personal pain points this year was in the way I phrased things. Eg: “Assembled Faction” vs “Game Faction Assembled”. 

Easy to use. If you find it tedious to maintain, you’re not going to do it. Whatever system, methodology, or collected information you decide to use, make sure it is something you can maintain. Giving up half way through isn’t going to help.

What do you do with it

Once you have your data and you decide to wrap it up, what do you do with the information? If you know someone who is a Tableau or R master, maybe give it them to do something interesting with it. 😀

Or, if you are like me, maybe just do some simple graphs in a spreadsheet. The wizards for creating those things are pretty intuitive for simple graphs. The more complex stuff might take some effort.

Then build on that information. It may influence your decisions, it may not. It might just tell an interesting story of your hobby life. Sony Entertainment thinks that works for Playstation Plus members. They just sent me an email telling me how much time I spent in certain games on my PS4 this year.

You can see in my own tracking where I ended up having free time during surgery recovery. Turns out, I painted just as many models then as I did the rest of the year. That led to me making a resolution this year to play and paint more in general. I can also use that to determine success. What is “more” after all? One more game? Or 20 more games? How will you measure your own success?

What are some of the things you track? What do you do with that data? Hop on over to the Skirmish Supremacy Street Team on Facebook and let us know.

Facebooktwittergoogle_plusredditpinterestmail

Easy Caribbean Board Part 2: The Modular Land Pieces

How-to guide for making a Caribbean themed Wargaming table.

Now that we have hammered out the water portion of the table it is time to tackle the land masses.
Just like the water portion, there is a lot of waiting time in between steps so this is not going to be done in a single day.  Tools for this build are easy to come by so it will not require you to have a lot of expensive equipment to make this happen.

Here are the tools that you need:

1:  Large Paint Brush.  The one I used was a house paint brush that is roughly 1 inch wide.
2:  Hot Glue Gun.  This will only be needed if you are going to be making taller rock formations.
3:  Large, cheap, dollar store kitchen knife.  Preferably serrated.  This will be used for crude cuts in the foam.
4:  Adjustable Razor:  This will be used for cutting your basic land masses out of the foam.
5:  Four 2ft x 2ft inch thick sheets of carpenter foam.  This is typically blue or pink.  I would highly recommend getting them in this size from your local hardware store instead of trying to cut them yourself without a big, expensive foam cutter.
6:  A textured rock about the size of your fist.  Lava rock or a concrete chunk will work.  This is actually the secret weapon of this whole build.
7:  OPTIONAL.  Assorted Small rocks.
8:  OPTIONAL.  Tiny rocks/ballast.
9:  Sand.
10:  Flock mixture.  Since we are going to be making a Caribbean-focused board, cut open and mix about 8-10 cheap bags of tea into the flock.  Plants tend to dry out in the heat quite quickly there.
11:  Large bottle of acrylic Umber paint.  I used Apple Barrel Burnt Umber from Walmart.  I think it cost me about $2.50 for the bottle.
12:  Small bottle of acrylic gray paint.  Again, I used Apple Barrel paint.  I got a small bottle of Granite Gray.  Cost about 60 cents.
13:  A 50/50 mix of white glue and water in a spray bottle.
14:  OPTIONAL.  Drywall filler to close gaps between layered sheets.
15:  80 grit sanding sponge.

Step One:  Set aside two large foam sheets that will not be cut.
Before you set them aside, beat them unmerciful with the rock.  Roll the rock around across the surface to create indentations.  Don’t be afraid to smash the rock into the surface a few times to create some craggy indentations.

Step Two:  Take the other two sheets and draw out your land shapes. 
For this part you will want to use the flat edges as the foam as your starting point.  From each sheet, you should make one 24 inch piece, two 12 inch pieces, three 8 inch pieces, and four 6 inch pieces (those measurements should be along the FLAT edge).  Once that is done, go head and cut out your basic land shapes with the razor.  If you have any excess foam, set it aside for later use.

Step Three:  Choose which pieces will have beach sections.
For beaches, you want to make sure they have a gradual angle so miniatures can stand on them.  A good rule of thumb for safe miniatures standing angles is at least a 3 inch angle for every one inch of height.  That will make a gradual enough grade for miniatures to stand on without toppling over.

To do this properly, measure in three or more inches from the carved edge of your piece to make your angle stopping point.  Then using the razor, start carving away at the angle.  Once you have taken down a good bit, switch to the cheap kitchen knife to finish it off.

Step Four:  Make your rocky outcroppings… well… rocky.
Using your cheap kitchen knife, use a combination of cuts and gouges to carve the rough edges of your rocky outcroppings.  This can be done by sinking the edge of the knife into the foam at an angle and then tearing the section out, making a rough triangular shape.  Do this at random to your edges EXCEPT YOUR FLAT EDGE until you are happy.  Then, beat them unmerciful with your rock just like you did the large foam sheets.  Treat them like they owe you lunch money.  Do this to the edges as well (again, except the flat edge) so they also take the rock texture.  If you are making a thicker outcropping with layers, then make sure that your angle cuts go into all of the layers to help make it look like one, large rock.  Once the carving is done on layers, use the drywall filler to blend the seams together.  You can easily do this by putting a bit on your finger and rubbing it onto the piece to get it to blend into the cracks.  the filler can be smoothed or thinned with a bit of water applied to your finger and rubbed over the piece.

With this portion done, you may wish to add a bit of extra texture to the layered pieces to make it look a bit more realistic.  Taking some white glue, place a dab down near the corners of the layers and place some small stones there.  Once you get those in place, put more glue down and in between the stones and add the ballast.  Let it all dry.

I will state it all again.  LEAVE YOUR MEASURED FLAT EDGES ALONE!  These are vital to help with the modular build.

Step Five:  Paint all of the rocky portions, flat edges, and large squares in umber.
Cover it all. Then, when dry, look for any exposed foam and cover it again.  Then when that layer is dry, check for thin spots and any exposed areas you missed and paint them again.  Repeat until it is all brown.

Step Six:  Drybrush all of the rocky portions with the gray.
I hope we all know to drybrush at this point.  If not, add a dab of paint to the brush and wipe it until there is barely any paint on the brush.  Then using even strokes, apply it to the pieces, catching all of the raised portions of the rocky sections.  This may take a few coats until you are happy.

Step Seven:  Apply Sand to the beach areas. 
Using your watered down glue mix, spray/brush on a layer of the mix on the exposed beach areas; they should not have been painted at all at this point.  Once the glue is down, apply a layer of sand.  Let it dry.  Come back and shake off any excess sand.  Apply another layer of the glue mix to the beach area and add sand again.  Let it dry.  When you are done playing video games in an hour, come back and shake off any excess sand again.  This time, apply another layer of glue and let it all dry.  This will add a shell to help prevent the sand from flaking off.

If you are using actual beach sand then you are done with this portion.  If you have a different color sand then you may have to apply your desired beach colors to the paint.

Step Eight:  Apply flock to your pieces.
Spread your 50/50 glue mix in your desired areas to apply flock.  On the large pieces you will want to cover about 75 to 80 percent of the board.  On the other pieces apply it to your liking.  Stay away from the flat edges so they will blend well with the other modular pieces.

Shake the flock mix down evenly across your glue.  Let it dry.  Come back and shake off any that did not stick.  If you have thin spots, apply more glue and apply more flock.  Let it dry.  Come back and shake off any excess and save for later builds.  Be thrifty and save it.  Don’t be wasteful!  Nobody likes a wasteful terrain maker.

Apply a thin layer of glue across the flock to seal it in.  Do this gently so you do not peel off the flock.  Let it dry.

Congratulations!  You now have your very own modular Caribbean amphibious table to use for your game of Blood and Plunder or Frostgrave:  Ghost Archipelago!  Now add some terrain to it and go and steal some treasure!!!

Until next time,
-Tim

Facebooktwittergoogle_plusredditpinterestmail

DIY Cube Tracker

I love gaming accessories. The little doodads that fulfill some sort of niche of a niche market. That token, measuring gauge, dial, all of it. The best part is seeing what other folks come up with to meet their own personal needs. Occasionally, someone comes up with an idea that the rest of the gaming community finds wonderfully useful. Today, I wanted to look at one of those things. Namely, the ModCube.

Back in 2015, ModCube found its way onto Kickstarter and had a successful launch. They quickly found their way into the hearts and minds of various users. Even to the point of being nominated for Best Gaming Accessory of 2015 from Beasts of War.

ModCube Size Comparison

Unfortunately, if you are interested in getting your hands on some of these things, you’re going to have to wait until they get around to launching their second iteration via Kickstarter sometime in 2018.

So let’s do something many gamers enjoy. We’ll make our own.

Step 01: Get some art

Vector art laid out in software

Luckily for us, ModCube recommends a good place to start. Game-Icons.net, http://game-icons.net/, offers free vector graphics that are explicitly meant to be used for gaming tokens. You can also dig around online and find other icons or items to be used. If you are feeling adventurous, you can use something like Vector Magic to convert some raster images to vector images that we can use. I did this for the tokens below that are from the game Confrontation.

I wanted to use vector graphics so that I could scale them as necessary without distorting the image. It also helps when you send it to whatever cutting tool you use.

Step 02: Cut it all out

acrylic tokens

I went down to my local makerspace to do the heavy lifting here. I used a Carvey CNC Router available in the space to make my cuts. I chose some acrylic because it will allow me to do a shallow cut and give some different texture or color to the tokens.

Here, you can see the tokens after they have been cut, just after I’ve given them a quick rinse in some water, and before I’ve really cleaned them up.

Step 03: Make them pop

acrylic tiles with paint

This step might not be necessary depending on your material and cutting method. For example, my next attempt at this, I’ll use some material that is two-tone and wouldn’t require a filler.

To help make the icons stand out and be distinct, I applied some white paint. This was important for this set since the Confrontation tokens have some very minor differences. In addition, I made my cuts a little too deep, which ate away at some of the detail unnecessarily. That’ll teach me to program the wrong bit.

Step 04: Design the cube

Now I needed a thing to put the tokens into. I verified my measurements and spent an afternoon designing one in OnShape.com’s online design platform. Since I’m modeling this off of the ModCube platform, I made it a cube. This isn’t going to be modular and hot-swappable like the official system, that’s a feature for another day.

Step 05: Print the cube and put it together

3d printed cube with token insert

I use a FDM 3D printer in my local makerspace to print off the cube in ABS plastic. I could have used PLA, but the ABS was already loaded and ready to go. Always count on gamer laziness.

You can see some bad areas. I wouldn’t consider this a great print. Acceptable for a test print, but I would definitely do this again for a final product.

Conclusions:

finished 3d cube with token inserts

Overall, I think this could work for my needs. It’s a little larger than I wanted it to be. I think I might scale it down a bit on the next run. Also, I would definitely use a laser to cut it. It would require less cleanup and effort that way. Lastly, some two-tone acrylic would remove the paint requirement.

Or I could wait patiently until the official product comes back. I don’t need the fancy magnet swap aspect on the v2 ModCube, but the time (3-4 hours) and money ($10USD) spent making my own might outweigh the cost of the official product. Not to mention I didn’t make my modular, if you like that kind of thing. Not all things are meant to be DIY.


*A link to the cube file I made will be made available later. Right now my browser isn’t playing nicely for me to get a fresh copy.


Facebooktwittergoogle_plusredditpinterestmail